Electronic dog fence – How to train your dog.
Simple Steps for training your dog to an electronic dog fence
Before commencing electronic dog fence training:
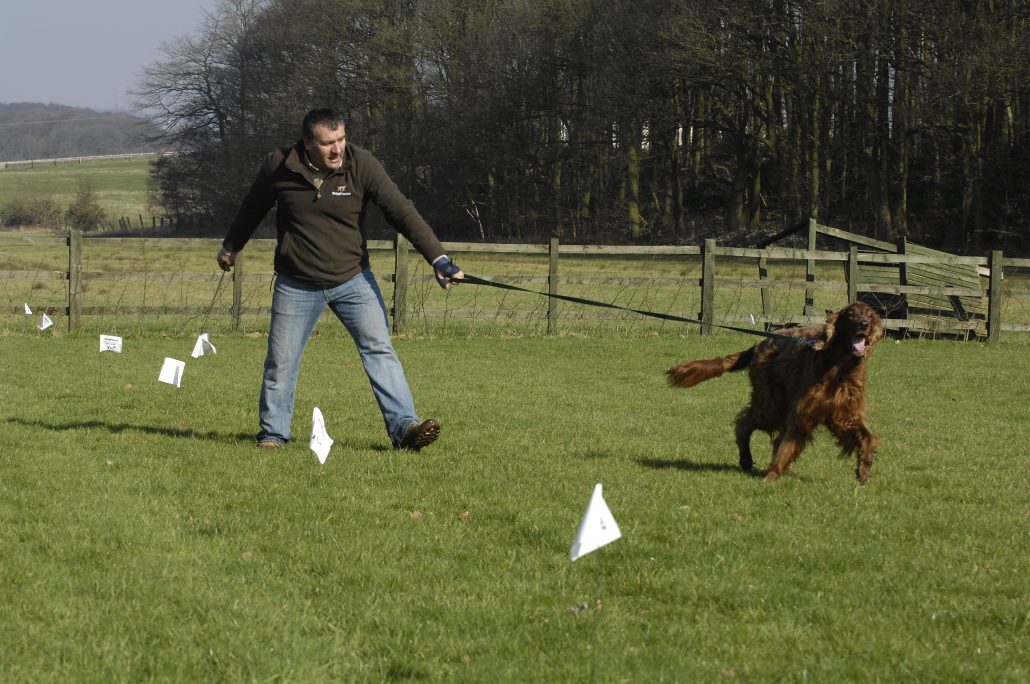
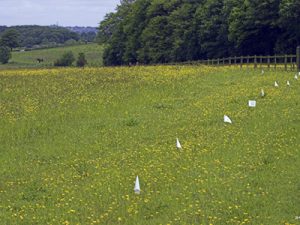
- Ensure that you have the correct amount of training flags to cover the boundary. The training flags are the most important part of the training protocol for electronic dog fences. The training flags should be placed approx 8 – 10ft apart around the boundary. Use the collar to find the edge of the avoidance zone and place the flag in the ground in the area where the collar starts to beep.
- Using the dog fence tester – set the collar to beep only mode. This means that the collar will not give out an impulse just an audible tone.
- Place the electronic dog fence collar on the dog and check that it correctly adjusted. As a guide you should be able to get 2 fingers in the neck strap when the dog’s neck is down. See our Trouble Shooting page for handy tips.
- Leave the collar on the dog for at least 30 mins before commencing the initial training session.
- Find a long lead – 6ft and ideally not the dog’s usual walking lead.
Commencing the training
- Take the dog outside on the lead.
- Walk the dog around the boundary and tap the flag so that there is good movement.
- As you tap each flag use a command word – a good example is “Watch out”.
- Allow the dog to go past the training flags into the correction zone (this is the area of the electronic dog fence where the collar will give both a beep and impulse). Allow the dog to linger here and hear the warning beep then direct him back into the garden. Use the command word and tap the flag again.
- Repeat this around the boundary for several small sessions over 1 – 2 days.
Introduction to Correction
- Place the electronic dog fence collar on the dog approx 20 – 30 mins before starting the training.
- Using the tester – lift the level on the receiver from level 0 (beep only) to level 1.
- Repeat the process of walking around the boundary and tapping the flags. Always use the command word when tapping the flag.
- Allow the dog to go past the flags into the avoidance zone. Look for any signs that the dog is feeling the impulse (a small twitch of the ear, little shake of the head).
- Carry on around the boundary allowing the dog to walk into the avoidance zone of his own free will. Never call or drag the dog into the electronic dog fence zone.
- If the dog is not responding to the level – lift the level to level 2 and repeat the process. Always direct the dog back into the safe area and praise the dog when he is back in the safe zone.
- Once the dog is reacting to the stimulation make a note of the level.
- After training play with your dog, praise him and reward him. Do not allow the dog to be off the lead in the garden during the training phase.
Introduction to Distractions
It is important the dog fully understands the warning beep and how to retreat when he is in a high drive moment. By carrying out the distraction training your dog will learn the electronic dog fence so that it becomes second nature. This will ensure that even when he is in a high drive state he stops at the warning beep. The distraction training will require 2 people.
- Walk around the boundary, tapping the flags and then have the new person walk into the flags and well into the avoidance area. See if the dog continues or decides to stop.
- If the dog continues allow him well into the zone to receive the stimulation and guide him back to you in the safe area. Give him the command word whilst guiding him back to the safe area. Praise him in the safe area.
- If the dog stops before or at the flags guide him back and praise him.
- Continue walking around the boundary and repeating the process.
- Once the dog is making the right decision (not walking into the flagged area) move on and try this on the driveways or open areas.
- If the dog is making good progress you may wish to drop the lead and walk into the flagged area with the companion. If the dog endeavors to follow give the command in aloud and firm voice.
- A good indication that the dog is fully at home with the electronic dog fence is when he looks away from the flags.
Repeat this process over a couple of days.
Letting your dog off the lead
- Walk the dog around a couple of areas and tap the flag if possible. Usually by this stage the dog will not venture near the flags so just give the command word even if you are several feet away from the flag.
- Go to the centre of the property and face the dog away from boundary.
- Remove the lead and start to walk back towards the house or a safe area.
- Play with your dog outside – you can roll a ball but always roll away from the avoidance zone.
- Do not leave the dog unsupervised in the garden for the first few days.
- After 14 days you can start to remove the flags. Remove the flags every other flag, every other day until they are gone.
Keep the flags in a safe place as if you wish to add on another pet you will need to re-flag the boundary and if you change the layout this will need to be re-flagged to give the dog a visual.
Points To Remember
Training your dog to the electronic dog fence should be fun!
Never throw a stick or ball into the avoidance zone.
Small bit size sessions are often better.
Always remove the dog fence collar at night or for a period of 8 hours in every 24 hour period.
Check the fit for your electronic dog fence collar regularly.
Check the battery status on your collar monthly (using the tester supplied).
DogFence Ltd are the largest installers of electronic dog fences in the UK. Our professional installer/trainers can set up your dog fence for you and will train your pet to the system. We also offer a post installation service to train new pets to the system. If you would like more information please call us on 01628 476475 or email info@dogfence.co.uk.


