
Tag Archive for: DIY dog fence

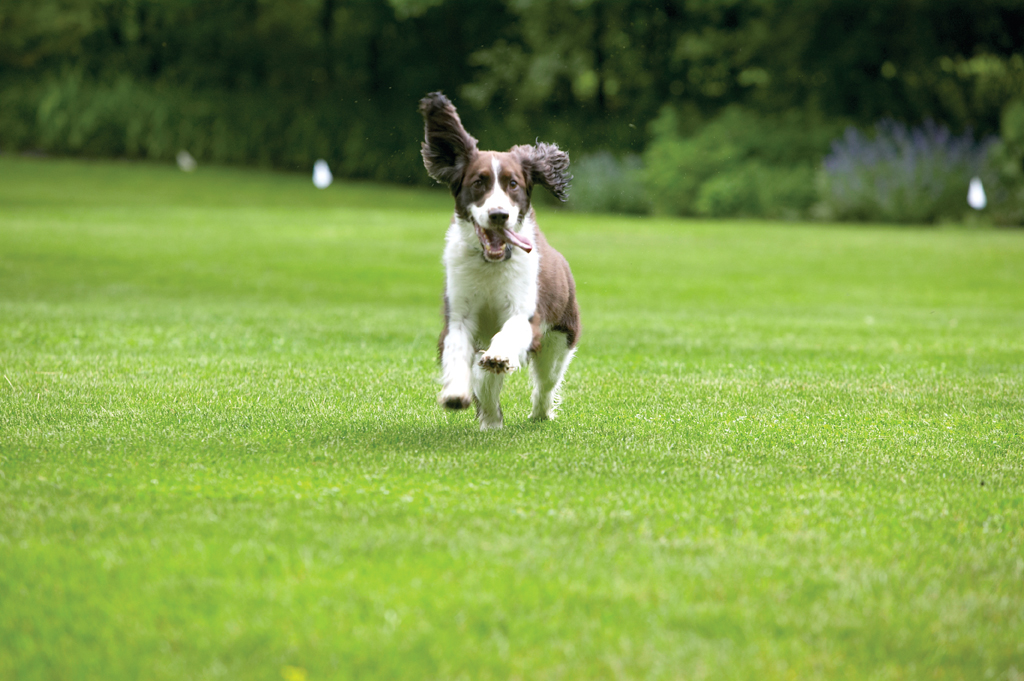
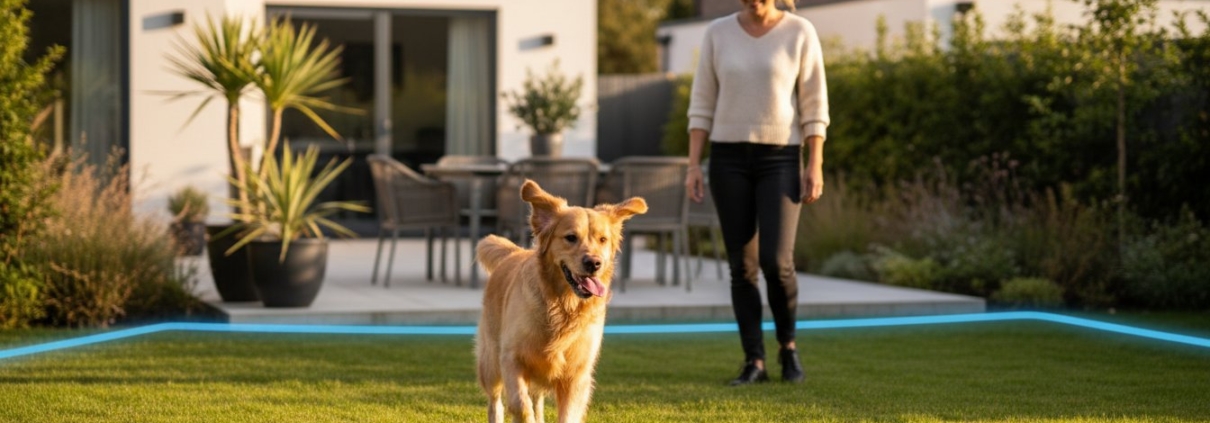
Dog running freely inside a wired or wireless dog fence boundary

Can I Self-Install a Wireless or Wired Dog Fence? | DogFence

Can I Self-Install a Wireless or Wired Dog Fence??

Yes, you can self-install both wired and wireless dog fences, but the installation process and the type of boundary they create are very different. A self-install wired dog fence uses a boundary wire that can be positioned to follow the shape of your garden, while a wireless dog fence generally creates a boundary using a central transmitter or, in the case of GPS systems, satellite positioning.

Choosing between a self-install wired dog fence, wireless dog fence or GPS dog fence depends on your garden layout, the size of the area you want to contain and, importantly, your dog. A system that is quick and easy to install is not necessarily the system that will provide the most suitable or reliable boundary for your property.

At DogFence, we have specialised in pet containment since 2003 and offer both self-install dog fence systems and professional installation with dog training. In this guide, we compare wired, wireless and GPS options, explain what is involved in installing them yourself, and help you understand which type of dog fence may be most suitable for your dog and garden.

Can I install a dog fence myself?

Yes. A wired electronic dog fence can be self-installed if you are comfortable planning the boundary, positioning the transmitter, laying the boundary wire, testing the system and following a structured dog training programme.

A typical DIY dog fence installation involves:

  • planning the safe area and boundary layout;
  • choosing a suitable position for the transmitter;
  • laying or burying the boundary wire around the property;
  • crossing driveways, paths or gateways where necessary;
  • creating any required exclusion or no-go zones;
  • connecting and testing the system;
  • setting up and correctly fitting the receiver collar;
  • placing temporary training flags along the boundary; and
  • training your dog to understand and respect the new boundary.

The physical installation is only part of the process. Training is fundamental to successful dog containment.

If you are considering doing the installation yourself, read our self-installing dog fence guide before you begin.

How does a DIY dog fence work?

With a wired hidden dog fence, a discreet boundary wire is installed around the area where your dog is allowed to roam. The wire carries a coded radio signal from a transmitter.

Your dog wears a lightweight receiver collar. As your dog approaches the boundary, the collar gives an audible warning. During training, your dog learns that the warning means they should turn back towards their safe area.

If you are new to electronic pet containment, our How the DogFence Works guide explains the boundary wire, receiver collar, warning zone and training process in more detail.

Watch: How does a DogFence work?

Before deciding between a self-install dog fence and professional installation, it helps to understand exactly how the system creates a safe boundary.

VIDEO: How the DogFence Works

Is a wireless dog fence easier to install yourself?

Usually, yes. A traditional wireless dog fence generally requires less physical installation because there is no boundary wire to lay. A transmitter creates a signal around a central point, which can make setup relatively quick.

However, easier installation does not automatically mean a wireless dog fence is the best solution for your property.

Wireless systems generally create a predetermined or circular containment area. That may work for some simple, open properties but can be restrictive where a garden is irregularly shaped or contains buildings, driveways, ponds, landscaping or areas your dog needs to avoid.

A wired dog fence allows the boundary to follow the actual shape of the property and can also create internal exclusion zones.

For a detailed comparison, read GPS & Wireless Dog Fences vs Hidden Fences and our article Wireless Dog Fence – The Truth: Do They Work?.

DIY wired dog fence vs wireless dog fence installation

The main difference is control over the boundary.
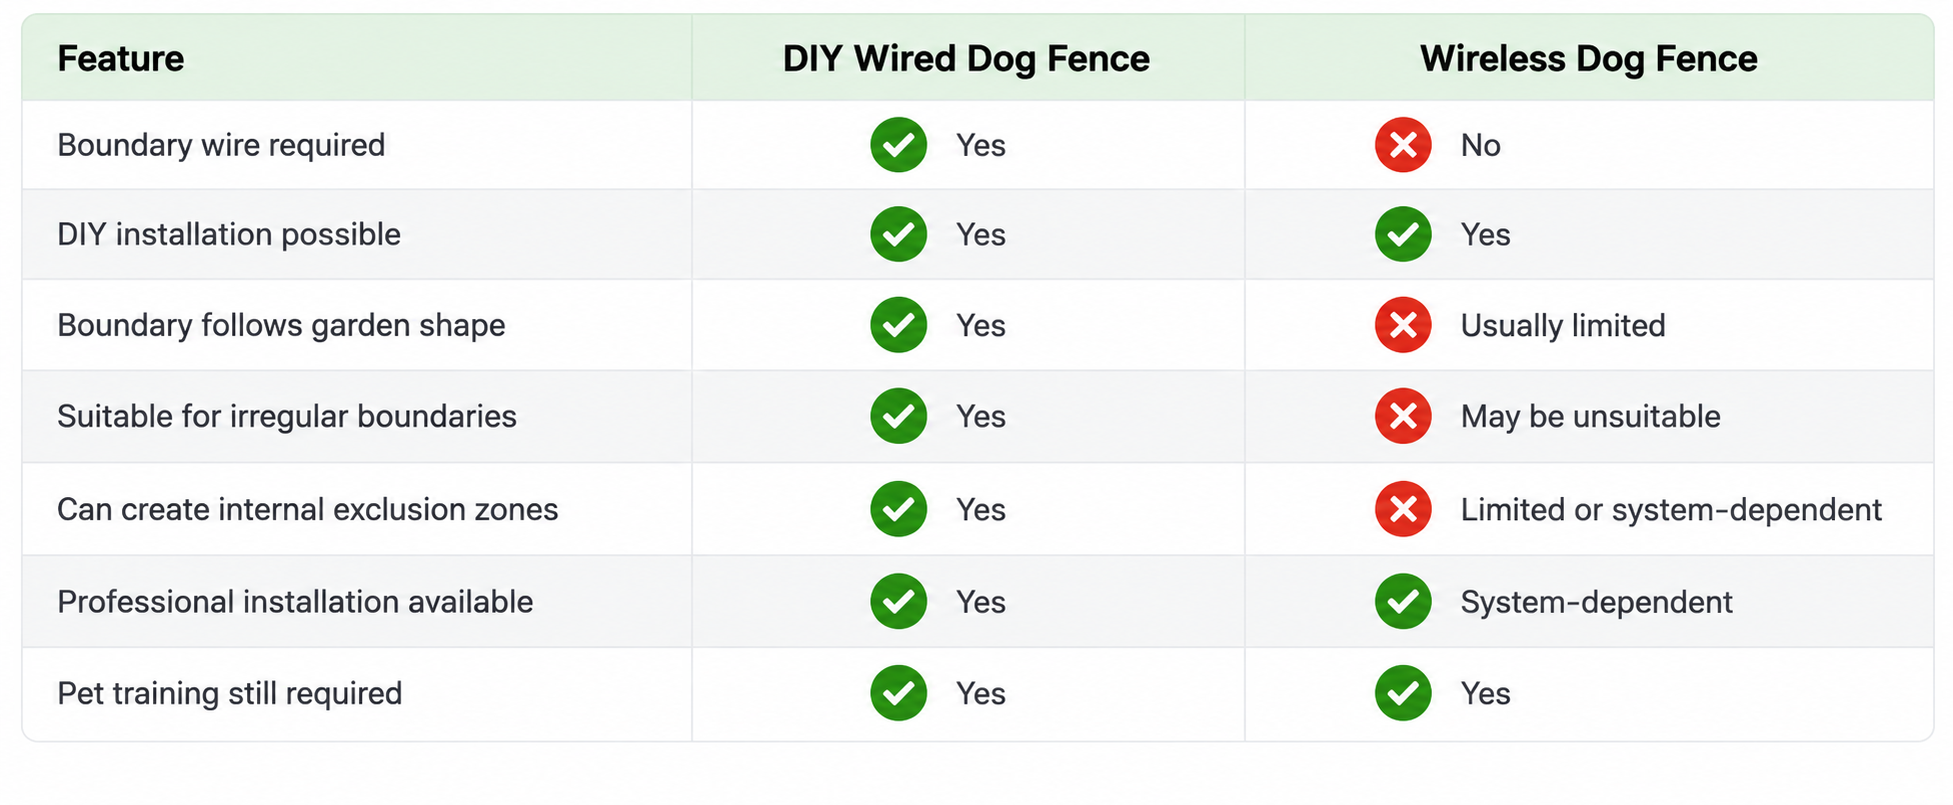
DIY wired dog fence vs wireless dog fence comparison showing installation and boundary features

This is why choosing a dog fence based purely on which one is easiest to install can be a mistake. The priority should be creating a consistent, appropriate boundary for your dog and property.

What are the advantages of a self-install dog fence?

For the right owner and property, a self-install dog fence has several advantages:

  • Lower installation cost: you provide the labour yourself.
  • Flexibility: you can carry out the work at a time that suits you.
  • Good for straightforward layouts: a simple garden can make DIY installation relatively manageable.
  • You know where the wire is: because you planned and installed the boundary yourself.

For a practical owner who is prepared to follow the installation and training instructions carefully, DIY dog fence installation can therefore be a perfectly viable option.

When is professional dog fence installation worth it?

Professional dog fence installation is particularly useful when the property or the dog’s requirements make the job more complicated.

You may prefer professional installation if:

  • you have a large or unusually shaped garden;
  • the boundary crosses several driveways or hard surfaces;
  • you need multiple exclusion zones;
  • your property includes woodland, slopes or difficult terrain;
  • you have several dogs;
  • your dog is an experienced escape artist;
  • you are unsure about choosing or fitting the correct receiver collar;
  • you don’t want to install and troubleshoot the boundary yourself; or
  • you would prefer an experienced trainer to introduce your dog to the system.

With a professionally installed DogFence system, the boundary is designed around the individual property, the equipment is installed and tested, and your dog’s initial training is carried out with you.
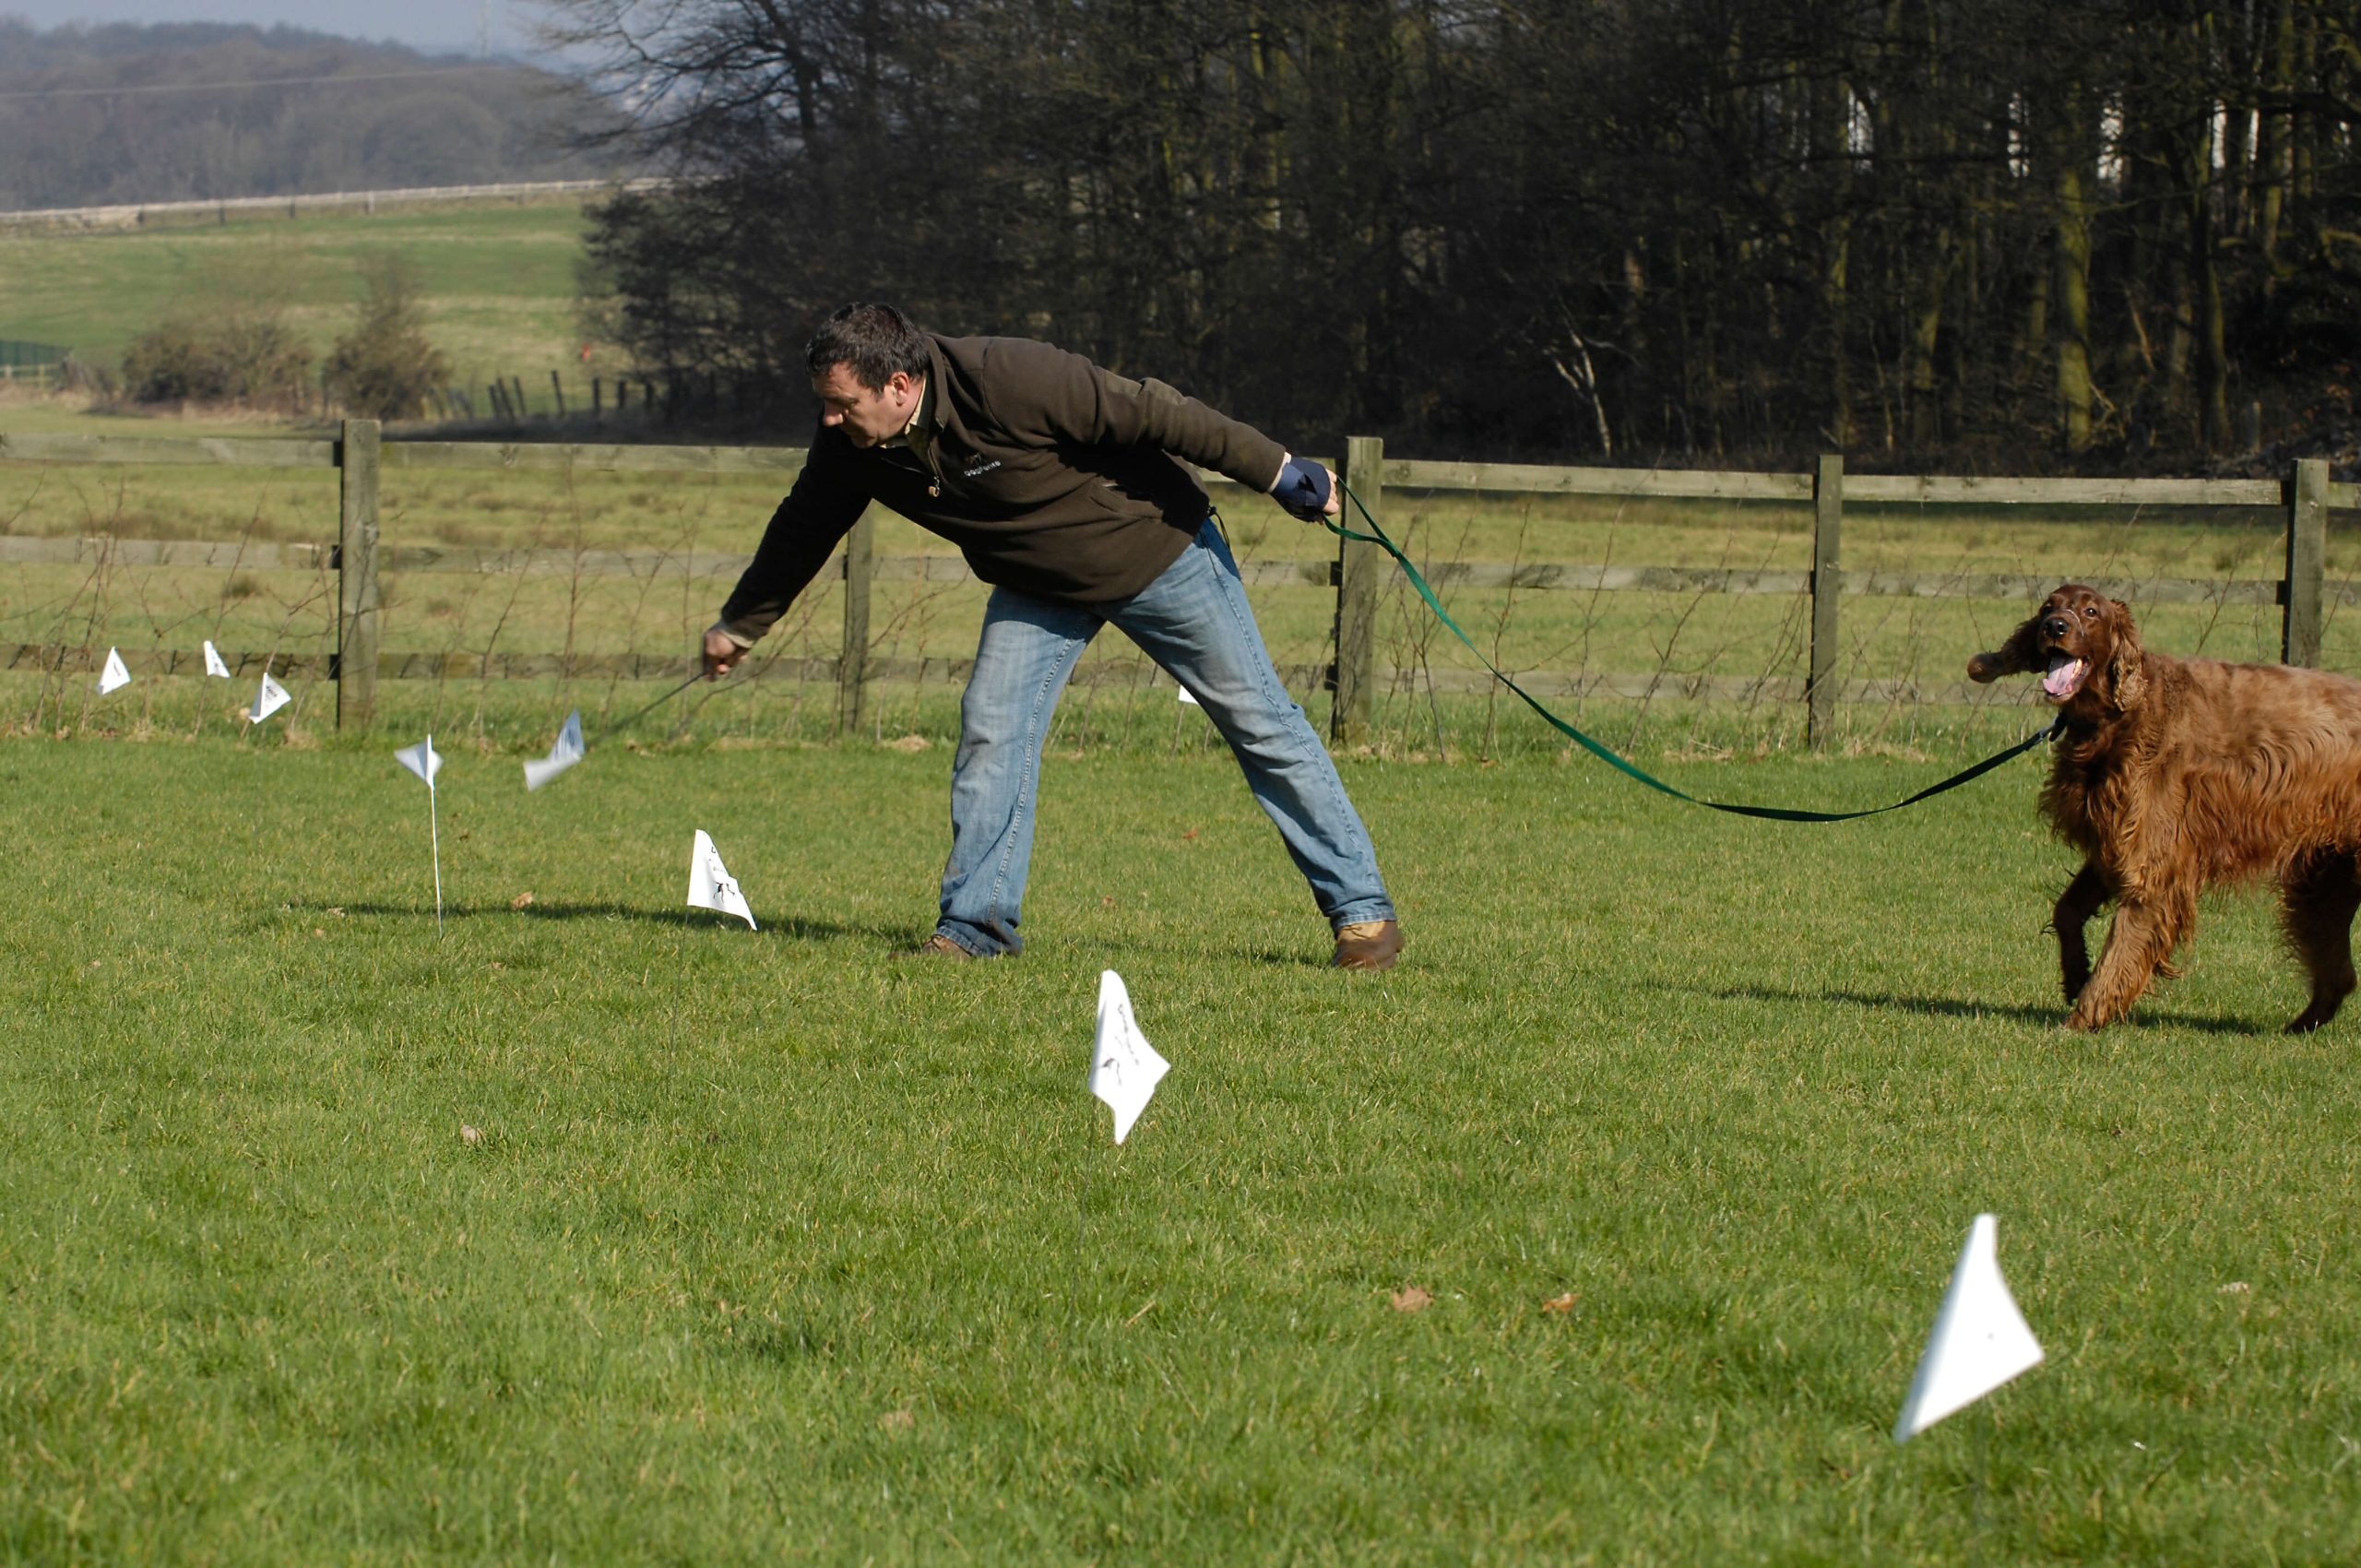
Professional dog fence training with dog learning the flagged boundary

Professional dog fence training helps your dog learn to recognise the warning tone and retreat safely from the flagged boundary.

Is professional training important with a hidden dog fence?

Training is one of the most important parts of any electronic dog fence, whether the system has been professionally installed or fitted by the owner.

A dog does not automatically understand an invisible boundary. Temporary training flags make the boundary visible while the dog learns to associate the location with the audible warning from the receiver collar.

Training should be gradual, consistent and appropriate for the individual dog. The objective is for the dog to hear the warning and confidently retreat back into the safe area.

Our professional installations include personalised pet training. You can read more about the process in our professional hidden fence training guide and our guide to training your dog to an electronic fence.

Can I install the fence myself and still train my dog myself?

Yes. Owners choosing a suitable self-install system can carry out both the installation and training themselves, provided they follow the manufacturer’s instructions and do not rush the training process.

Consistency matters more than speed. Short, calm training sessions allow your dog to understand where the boundary is and what the warning tone means.

If your dog appears confused, anxious or is repeatedly challenging the boundary, stop and seek advice rather than simply increasing the collar setting.

How difficult is underground dog fence installation?

The difficulty of underground dog fence installation depends heavily on the property.

A relatively small lawn with soft ground and a straightforward perimeter can be considerably easier to self-install than a large rural property with long driveways, walls, gates, woodland and multiple areas that need protecting.

The boundary wire does not necessarily need to be deeply buried. Its purpose is to carry the radio signal and define the boundary, so installation should follow the requirements of the particular system and the conditions of the property.

Planning the route correctly before starting is important. A poorly planned boundary can create unnecessary installation work and may not provide the containment area you actually need.

Should I choose DIY or professional dog fence installation?

There isn’t one answer that is right for every owner.

DIY dog fence installation may suit you if your property is reasonably straightforward, you are comfortable carrying out the installation and you have the time and confidence to train your dog correctly.

Professional dog fence installation may be preferable if your property is large or complicated, your dog has challenging escape behaviour, or you simply want the reassurance of having the system designed, installed, tested and introduced to your dog by an experienced specialist.

Most importantly, don’t choose solely on the basis of installation convenience. The best dog fence is the one that provides a reliable boundary appropriate for your particular dog and your particular garden.
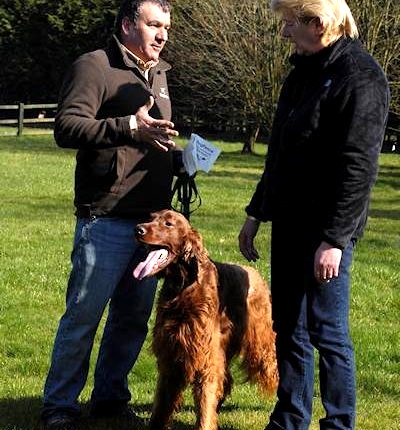
Installer giving dog fence safety tips to a customer

A DogFence trainer giving the owner practical training advice while introducing their dog to the flagged boundary

Frequently Asked Questions About DIY Dog Fence Installation

Can I install an electronic dog fence myself?

Yes. Some electronic dog fences are designed for self-installation. A wired system requires you to plan and install the boundary wire, connect and test the transmitter and receiver collar, place training flags and then train your dog to understand the boundary.

Do I need an electrician to install a dog fence?

Not normally for a standard self-install dog fence system, provided you have a suitable power supply and follow the manufacturer’s installation instructions. More complicated electrical work should always be carried out by an appropriately qualified person.

Does an underground dog fence wire have to be buried?

Not always. Depending on the system and location, boundary wire can sometimes be secured at ground level or incorporated into existing features. Burying it can help protect the cable from gardening, mowing and other accidental damage.

Is a wired or wireless dog fence better for an irregular garden?

A wired dog fence generally offers greater control over the shape of the boundary because the wire can follow the actual perimeter of the garden and create specific exclusion zones. Traditional wireless systems are usually more restricted in the shape of the containment area they can create.

Can I install a dog fence around a large property?

Yes. Wired electronic dog fences can be used for large and rural properties, but the greater the area and the more complicated the terrain, the more valuable professional boundary planning and installation may become.

Do dogs still need training after DIY installation?

Absolutely. Installing the equipment does not teach the dog where the boundary is. Structured boundary training is an essential part of both DIY and professionally installed electronic dog fence systems.

Not sure whether to self-install or have your DogFence professionally installed?

Dog running freely inside a self-installed wired dog fence boundary

A correctly installed and trained DogFence gives dogs the freedom to enjoy their garden safely within their boundary.


Tell us about your dog, your garden and what you’re trying to achieve. With more than 20 years’ experience in pet containment, we’ll tell you whether we think a DogFence is suitable – and we’ll tell you if we don’t.

📞 Call us on 01628 476475
💬 Chat to us on WhatsApp

GET MY FREE QUOTE

No pressure. No one-size-fits-all solution. Just experienced advice about the safest way to give your dog more freedom.

This article is intended as general information about dog containment and does not replace individual advice about your dog, property or training requirements. Some content has been prepared with the assistance of AI and reviewed and edited by DogFence Ltd based on our experience of pet containment systems in the UK.

 

DIY Hidden Dog Fence Kit: The Complete UK Buyer’s Guide for 2026

DIY Hidden Dog Fence Kit: The Complete UK Buyer’s Guide for 2026

Last Tuesday, Sarah from Surrey watched her Golden Retriever, Barnaby, clear a six-foot garden gate in under three seconds, leaving her with a racing heart and a frantic search through the neighbourhood. It’s a terrifying moment that 27% of UK pet owners experience at least once, and it’s why you’re looking for a solution that balances safety with garden aesthetics. You want your pet to enjoy the fresh air, yet the thought of a complex installation or confusing FM radio signals feels overwhelming. By choosing a DIY hidden dog fence kit, you can secure your property’s perimeter yourself, saving upwards of £550 in professional labour costs while ensuring your dog’s protection.

We understand that your pet’s safety is non-negotiable. You likely feel that a secure garden shouldn’t require a degree in electronic engineering or a massive budget. This guide will show you how to select the right hardware for 2026, decode the technical jargon, and master the training process to give your dog safely contained freedom. We’ll walk through everything from wire placement to the final boundary test to ensure you achieve total peace of mind.

Key Takeaways

  • Understand how modern FM radio technology creates a secure boundary, offering your pet the freedom to roam while providing you with essential peace of mind.
  • Learn to choose the ideal DIY hidden dog fence kit for your specific UK property by calculating required wire length and assessing your dog’s individual drive.
  • Follow a methodical guide to installing your system, from testing the signal field to securing the boundary wire against existing garden structures.
  • Discover the secrets to a successful training programme that ensures your dog remains safely contained and happy within their new invisible environment.
  • Gain clarity on when to tackle the installation yourself and when the complexity of your landscape warrants the expertise of a professional installer.

What is a DIY Hidden Dog Fence Kit and Is It Right for You?

A DIY hidden dog fence kit represents a sophisticated approach to pet containment, moving beyond the limitations of physical barriers. At its heart, the system utilizes a buried wire to transmit a coded FM radio signal to a receiver collar worn by your pet. This technology creates an invisible boundary that keeps your dog safe within the garden. For many UK homeowners, what is a pet fence? It’s more than just a wire; it’s a blend of technology and training designed to offer your dog the freedom to explore while granting you total peace of mind. Unlike traditional fencing, these systems don’t rely on physical height or strength but on a consistent digital signal that alerts your pet as they approach the perimeter.

The core benefit of this technology is the unique balance it strikes between security and liberty. Your pet enjoys the happiness of an open space, while you benefit from the protection of a reliable containment solution. Because the system uses FM radio frequencies, it’s highly resistant to interference from other household devices, ensuring the boundary remains stable 24 hours a day.

The Aesthetic Advantage of Hidden Boundaries

Preserving the visual integrity of a British garden is often a priority, especially for those living in Grade II listed buildings or Areas of Outstanding Natural Beauty (AONB). Traditional timber or metal fencing can often clash with heritage landscapes or require complex planning permissions that are difficult to obtain. A hidden fence remains entirely out of sight, maintaining the “open” feel of your property. This psychological openness benefits both the owner and the pet, as it removes the “caged” sensation often associated with 6-foot wooden panels. It allows your landscaping to take centre stage without the interruption of unsightly wire mesh or heavy wooden posts.

DIY vs Professional: Assessing Your Handyman Skills

Installing a DIY hidden dog fence kit requires a specific set of skills and tools. You’ll typically need the following items for a successful setup:

  • A lawn edger or a petrol-powered trenching tool for burying the wire.
  • Wire strippers and a waterproof splicing kit to ensure secure connections.
  • A digital multimeter to check for continuity in the loop.

For a standard half-acre garden, expect to spend between 6 to 10 hours on the installation process. This includes the initial layout, burying the wire at a depth of 1 to 3 inches, and setting up the indoor transmitter. If the ground is particularly stony or contains heavy clay, the physical labour increases significantly. While a straightforward rectangular lawn is manageable for a handy homeowner, more complex layouts featuring extensive hardscaping or dense woodland might necessitate a professional touch. Statistics from our support desk indicate that 15% of DIY attempts eventually require professional intervention due to improper wire depth or signal interference on properties exceeding 2 acres.

Essential Components of a High-Performance Self-Install Kit

Investing in a DIY hidden dog fence kit requires a clear understanding of the hardware that ensures your pet’s security. A reliable system isn’t merely a collection of parts; it’s a synchronised safety network designed to function 24 hours a day in the variable British climate. To achieve professional-level results, your kit must include four primary elements.

  • The Transmitter: This is the central command hub. It’s usually mounted in a dry location like a garage or utility room. It broadcasts a coded FM radio signal through the boundary wire, acting as the “brain” that monitors the loop’s integrity.
  • The Receiver Collar: These lightweight, waterproof units are worn by your pet. They’re designed for 24/7 comfort and only activate when the dog approaches the hidden boundary.
  • Boundary Wire: While budget kits often include thin, 0.75mm wire, a high-performance kit utilises 1.5mm heavy-grade copper cable. This thickness is the professional standard, providing the durability needed to withstand soil acidity and ground shifts for over 20 years.
  • Training Flags: These serve as temporary visual markers. They allow your dog to “see” the invisible line during the initial 10 to 14 days of boundary conditioning.

Why FM Safelink Technology is Non-Negotiable

Most entry-level containment systems use AM radio signals, which are highly susceptible to interference. Household items like garage door openers, televisions, or even large metal structures can trigger “false activations,” causing the collar to pulse when the dog isn’t near the boundary. Our systems utilise patented FM Safelink technology. This digital signal is unique to the receiver, virtually eliminating the risk of accidental corrections. When considering the safety and reliability of electronic fences, using a secure FM frequency is the only way to guarantee a consistent and stress-free environment for your pet.

Receiver Collar Features: R12 vs R12mini

Choosing the correct receiver is vital for both comfort and effectiveness. The R12 is the workhorse of the range, ideal for medium to large breeds with its robust casing and long-range signal pick-up. For smaller companions or cats, the R12mini offers a scaled-down profile that won’t weigh down a delicate neck. Both models feature adjustable correction levels, allowing you to tailor the stimulus to your dog’s specific temperament, whether they’re a sensitive Spaniel or a headstrong Terrier. Unlike generic brands, these units use proprietary DogWatch batteries that offer a lifespan of up to two years, ensuring the system is always ready when you need it. You can explore our professional-grade components to see which receiver best suits your pet’s needs. This level of customisation provides the peace of mind that comes from knowing your “Trusted Guardian” is always on duty.

Choosing the Best DIY Hidden Dog Fence Kit for Your Property

Selecting the right DIY hidden dog fence kit requires more than a cursory glance at the box. You must evaluate your garden’s specific dimensions alongside your pet’s unique temperament. A standard 150-metre wire coil typically secures a half-acre garden, but larger UK properties often require additional spools to ensure complete coverage. For instance, a two-acre paddock will likely demand 350 metres of high-quality boundary wire to maintain a consistent signal.

Your dog’s personality is the next critical factor. A 35kg Rhodesian Ridgeback with a high prey drive requires a different correction profile than a timid Cavalier King Charles Spaniel. Professional-grade kits offer adjustable intensity levels, allowing you to tailor the system to your pet’s specific “drive” and learning pace. This ensures the correction is high enough to be a deterrent but low enough to remain humane and safe.

Safety doesn’t stop at the back door. The IB-100 internal transmitter is a vital addition for creating “no-go” zones inside the home. This compact device can protect your kitchen counters or keep your beloved pet off expensive sofas without the need for physical gates. It’s an essential component for owners seeking total peace of mind across their entire living space.

Don’t overlook the technical safety of the hardware itself. UK power grids are susceptible to surges during seasonal storms. Including a dedicated surge protector acts as a sacrificial barrier, preventing your £350 transmitter from being destroyed by a single lightning strike or power spike. This small addition is a non-negotiable for long-term system reliability.

Mapping Your Boundary Layout

The “Perimeter Loop” is the most common layout, encircling your entire property to provide maximum freedom. If you only wish to secure the rear garden, a “Double Loop” creates a three-sided barrier. You can create “dead zones” by twisting the outgoing and return wires together. This allows your dog to walk over the wire safely, which is perfect for crossing driveways or paths. Ensure your wire stays at least 2 metres away from buried 240V power lines to prevent signal interference that could confuse the collar.

Kit Customisation Options

Every household is different. You can easily expand your DIY hidden dog fence kit by adding extra collars for multi-pet families, as a single transmitter can support an unlimited number of dogs. For those living in areas with rocky soil or heavy clay, upgrading to pro-grade 1.5mm or 2.5mm HDPE-coated cable is a wise choice. This thicker insulation resists moisture and physical wear far better than standard wire. Finally, choosing a specific collar strap colour helps you quickly identify which dog is wearing which receiver during their morning routine.

DIY Hidden Dog Fence Kit: The Complete UK Buyer’s Guide for 2026

The Step-by-Step DIY Installation and Training Process

Successfully commissioning a DIY hidden dog fence kit requires a methodical approach that prioritises your pet’s safety and your garden’s aesthetics. The process begins with a “dry run” to ensure technical accuracy. You should lay the boundary wire on the surface of your lawn exactly where you intend to bury it. Connect the loop to your transmitter and walk the perimeter with the receiver collar. This simple test confirms the signal is consistent across the entire 360-degree loop before you commit to any groundworks.

Once the signal is verified, your next task is setting the “warning zone” on the transmitter unit. In typical UK residential gardens, a field width of 1.5 to 2 metres is recommended. This provides your dog with a clear audible alert, allowing them enough time to react and retreat before they reach the active correction zone. It’s a crucial calibration that balances the dog’s freedom with the absolute necessity of containment.

Techniques for Burying Boundary Wire

For a standard lawn, a sharp spade or a manual lawn edger is the most effective tool for creating a shallow trench. You only need to reach a depth of 5cm to 8cm to protect the cable from lawnmowers and aerators. If your boundary crosses a gravel drive, place the wire inside a 10mm protective conduit to prevent shifting stones from causing abrasions. For properties with block paving, you can often tuck the wire into the sand-filled expansion joints using a blunt putty knife. If burial isn’t an option due to dense root systems, securing the wire to post-and-rail fencing or the base of a hedge with weather-resistant cable ties is a perfectly reliable alternative.

Mastering the Training Phase

The “Trusted Guardian” approach is what transforms a technical system into a reliable safety solution. You must commit to a 10 to 14-day training protocol to ensure your pet understands the new logic of their environment. This isn’t about restriction; it’s about teaching them where they are safest.

  • Phase 1: Visual Awareness (Days 1-4). Place white training flags every 2 metres along the boundary. Walk your dog on a lead and let them hear the audible “beep” warning. Immediately move them back into the safe zone and provide high-value positive reinforcement, such as a favourite treat or praise.
  • Phase 2: Introduction to Correction (Days 5-14). Once the dog identifies the flags and the sound, they are introduced to the static correction. This teaches them that the warning beep is a definitive prompt to turn back. By the end of the second week, 99% of pets will naturally avoid the boundary, allowing you to remove the flags and enjoy true peace of mind.

If you’d prefer a system that includes expert guidance and a lifetime equipment warranty, explore our professional hidden fence solutions for total security.

DIY vs Professional Installation: Making the Final Decision

Deciding whether to install a DIY hidden dog fence kit or hire an expert often depends on the specific layout of your property and the temperament of your pet. While a self-install kit offers a cost-effective solution for standard, level gardens, UK landscapes frequently present challenges that require more than a basic manual. You’ll need to weigh the initial savings of a weekend project against the long-term reliability of a system designed to last decades.

Identifying Complex Boundary Challenges

Large estates over 2 acres often require professional-grade hidden pet containment systems to ensure the digital signal remains consistent across the entire perimeter. If your boundary crosses a stream, winds through dense woodland, or navigates complex water features, a DIY approach might lead to signal “dead zones.” Professional electric dog fence installation is safer for high-distraction environments. Our installers use heavy-duty, direct-burial cable that withstands the damp UK climate far better than the thinner wire found in most retail kits.

Technical precision is vital when your garden contains high levels of metal, such as reinforced concrete or underground utilities. These elements can interfere with a standard DIY hidden dog fence kit, causing the boundary to shift or fail. A professional installer uses diagnostic equipment to calibrate the system specifically for your soil type and local interference levels, ensuring the “invisible” fence remains exactly where it’s intended to be.

The Value of Expert Training

The most significant difference between DIY and professional services isn’t the wire, it’s the training. We act as a “Trusted Guardian” for your pet’s safety, providing a structured programme that respects the emotional bond you share with your dog. While DIY manuals offer general steps, our experts adapt the training to your dog’s specific personality. This professional guidance ensures your pet understands the boundary within 3 to 4 days, avoiding the confusion or fear that can arise from poorly managed self-training.

The DogFence Professional Guarantee

Peace of mind comes from knowing your system is backed by a UK expert. DIY warranties typically cover only the transmitter for 12 to 24 months, leaving you responsible for finding and fixing wire breaks. Our professional systems, particularly the DogWatch 1200Fence, offer superior longevity and comprehensive support. We provide ongoing assistance and specialized wire break location services for our customers, using precision tools to find faults without digging up your entire lawn.

Choosing a professional installation means choosing a lifetime of freedom for your pet and total confidence for yourself. If your garden demands more than a basic setup, we’re here to help.

View our Professional Installation Services

Secure Your Pet’s Freedom with Confidence

Choosing the right DIY hidden dog fence kit is a significant step toward balancing your dog’s natural curiosity with the essential need for safety. You now understand that a successful installation hinges on using reliable FM Safelink technology and committing to a structured training programme. At DogFence, we bring over 20 years of UK pet safety experience to every garden we protect. We’re proud to be the exclusive UK distributor of DogWatch FM technology; a system that’s already trusted by thousands of UK estate owners. Our solutions ensure your property remains beautiful without the need for unsightly physical barriers. Whether you’re managing a small cottage garden or a sprawling 10 acre estate, the right containment system offers a lifestyle improvement for the whole family. You don’t have to navigate this decision alone. Our experts are here to provide the technical competence and empathetic support you need to protect your beloved companion.

Explore our range of Professional and DIY Pet Containment Solutions

We look forward to helping you find the perfect balance of protection and freedom for your home.

Frequently Asked Questions

Is a DIY hidden dog fence kit legal in the UK?

A DIY hidden dog fence kit is entirely legal to use in England, Scotland, and Northern Ireland as of 2024. While Wales introduced specific restrictions under the Animal Welfare (Electronic Collars) (Wales) Regulations 2010, the rest of the UK permits these systems for pet containment. Our technology prioritises animal welfare by using an audible warning zone, giving your pet the chance to retreat before any correction occurs.

How deep should I bury the boundary wire in my garden?

You should bury your boundary wire between 5 and 15 centimetres deep to protect it from garden maintenance tools. Placing the wire at a depth of 10 centimetres is usually ideal for most British gardens, as it stays safe from lawnmowers while maintaining a strong signal. If you bury the wire deeper than 20 centimetres, the signal strength may weaken, which could lead to inconsistent collar activation.

Can I install a DIY dog fence across a gravel driveway?

You can certainly install a DIY hidden dog fence kit across a gravel driveway by placing the wire inside a protective conduit. Using a 20mm PVC pipe protects the cable from the weight of vehicles and the abrasive nature of the stones. We recommend digging a narrow trench 15 centimetres deep across the drive to ensure the wire remains undisturbed and your pet’s protection stays continuous.

Will a DIY hidden fence work for a very small dog or a cat?

Specialised lightweight receivers are available for cats and small dog breeds weighing as little as 2.5 kilograms. These compact units are designed to be unobtrusive, ensuring your smaller pets enjoy their freedom without being weighed down by heavy hardware. It’s vital to select a system with multiple intensity levels so you can calibrate the settings specifically for a smaller animal’s sensitivity and temperament.

What happens if the boundary wire breaks in a self-installed system?

Your indoor transmitter will sound a continuous audible alarm the moment a break in the boundary wire is detected. You don’t need to dig up your entire lawn to find the fault; instead, you can use a portable wire break locator to pinpoint the exact location of the damage. Most 2026 kits include waterproof gel-filled splice capsules that allow you to reconnect the wire securely against the damp UK climate.

Do I need a special transmitter for a garden larger than one acre?

You will need a high-power transmitter if your property boundary exceeds 400 metres or covers more than one acre of land. Standard transmitters found in basic kits often lack the power to push a consistent digital signal across very large perimeters. Upgrading to a professional-grade transmitter ensures the signal remains stable at the furthest corners of your estate, providing total peace of mind for owners of large rural properties.

How long does the battery last in a DIY receiver collar?

The lithium batteries in most modern receiver collars last between 3 and 6 months depending on how frequently your dog approaches the boundary. High-performance 3-volt or 6-volt batteries are designed to withstand the cold temperatures of a British winter without losing power. You should check the low-battery indicator light on the collar every 30 days to ensure your pet’s safety system is always fully operational.

Can I use a DIY kit if I already have a physical fence?

Installing a hidden fence alongside a physical barrier is an excellent way to stop dogs from jumping over or digging under existing fences. This creates a psychological boundary that keeps your pet a safe distance away from the physical perimeter. By placing the wire approximately 1 metre inside your wooden or metal fence, you eliminate the risk of your dog getting stuck or injured while trying to escape.